A clogged dryer vent hose doesn’t just slow down laundry day—it can also become a fire hazard and drive up your energy bills. Regular dryer vent hose cleaning is one of the simplest ways to improve airflow, boost dryer efficiency, and keep your home safe. In this guide, we’ll walk you through the preparation, cleaning process, and troubleshooting tips to ensure your dryer runs smoothly.
Preparation: Tools You’ll Need
Before getting started, gather the right tools for the job:
- Vacuum cleaner with a hose attachment
- Dryer vent cleaning brush (long and flexible is best)
- Screwdriver (to loosen clamps or panels)
- Microfiber cloth for wiping lint and dust
- Duct tape or clamps to resecure connections
- Having these items on hand will make the job quick, safe, and thorough.
Step-by-Step Dryer Vent Cleaning Guide
Step 1: Unplug and Disconnect
Safety always comes first when performing dryer vent cleaning. Begin by unplugging your dryer and gently pulling it a few feet away from the wall. This gives you enough space to work. Next, disconnect the vent hose from both the back of the dryer and the wall outlet. If your hose is attached with clamps or tape, loosen them carefully to avoid tearing the material.
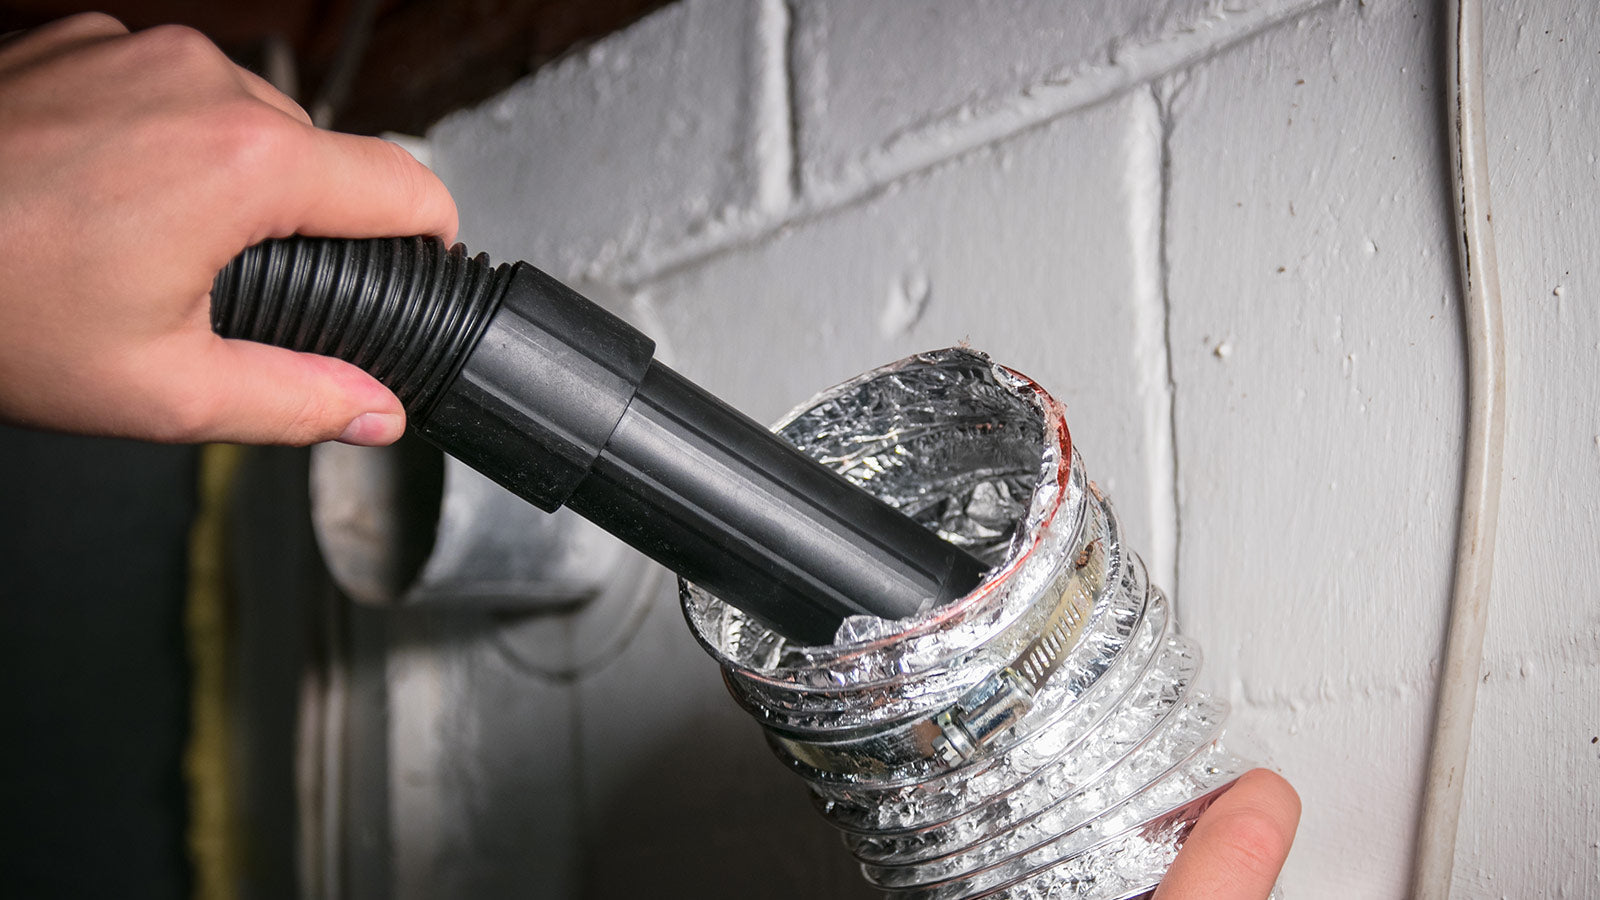
Step 2: Vacuum the Dryer and Hose
Use a vacuum cleaner with a hose attachment to remove as much lint as possible from both the dryer’s vent opening and the inside of the hose. Pay special attention to the area around the lint trap, where buildup is often the heaviest. Regular vacuuming helps prevent lint blockages, improves airflow, and reduces the risk of overheating or even fire hazards caused by trapped debris.
Step 3: Brush Out the Hose
After vacuuming, insert a dryer vent cleaning brush into the hose. Rotate it as you push it through to loosen stubborn lint clumps that the vacuum couldn’t reach. Work from both ends of the hose for the most thorough clean. If your hose is long or flexible, you may need an extension rod or a flexible brush kit to reach every section.
Step 4: Wipe and Inspect
Use a soft microfiber cloth to wipe away any remaining dust or residue from the hose and surrounding areas. Then, inspect the hose carefully under good lighting. Look for cracks, punctures, or melted sections — all of which can cause air leaks and reduce drying efficiency. If you notice any damage, it’s best to replace the hose immediately to maintain safety and performance.
Step 5: Reassemble and Test
Once the hose is clean and dry, reconnect it securely to both ends using clamps or aluminum duct tape. Make sure the connections are tight but not overly compressed, as this can restrict airflow. Push the dryer back into place, plug it in, and run a short drying cycle to confirm strong airflow and proper ventilation. If you feel weak air pressure at the outside vent, double-check for hidden clogs or kinks in the hose.
If you clean your dryer vent hose regularly, investing in a dryer vent cleaning kit can save time, improve airflow, and keep your appliance running efficiently. These kits usually include:
- A long, flexible brush that reaches deep into the hose and ducts
- Extension rods to clean longer vents
- Attachments compatible with standard vacuums for powerful lint removal.
Common Problems and Quick Solutions
Obstructions: If airflow is still weak after cleaning, there may be a blockage deeper in the duct. Use an extended vent brush or contact a professional.
Cracks or Breakage: A leaking hose can cause the dryer to overwork and increase fire risk. Replace worn-out hoses promptly—rigid metal vent hoses are safer and less prone to clogs than plastic ones.
Frequent Lint Buildup: Clean your dryer lint filter after every load, and schedule a hose cleaning every 3-6 months depending on usage.
Final Thoughts
Dryer vent hose cleaning may not be the most glamorous household chore, but it pays off in major ways: faster drying cycles, lower energy bills, and safer laundry rooms. By taking just a few minutes every few months, you'll extend the life of your dryer and enjoy peace of mind knowing your home is protected from preventable fire risks.
Sources:
- National Fire Protection Association (NFPA) – Home Dryer Fires Report
- U.S. Consumer Product Safety Commission (CPSC) – Clothes Dryer Safety Tips
- U.S. Department of Energy (DOE) – Energy Efficiency Tips