Tools and Materials Needed
- Dryer vent hose
- Screwdriver
- Clamps
- Metal tape
- Vent hood (optional)
- Drill (if installing a new vent exit)
Step 1: Choose the Right Hose
Select a dryer vent hose that fits your dryer’s output and the external venting system. Flexible hoses made of aluminum or metal are preferred over plastic for their durability and fire resistance.
Step 2: Disconnect the Dryer
Before beginning, make sure your dryer is unplugged from the power source to avoid any electrical hazards. If it is a gas dryer, also turn off the gas supply to ensure safety.
Step 3: Clean the Venting Area
Remove any lint and debris from the venting area and the hole where the vent hose will be connected. This will help maximize airflow and efficiency.
Step 4: Attach the Vent Hose to the Dryer
Slide one end of the hose over the dryer’s vent port. Secure it with a clamp by tightening the screw on the clamp around the hose. Make sure it’s snug to prevent any disconnections or leaks.
Step 5: Route the Hose
Carefully stretch out the hose to the external vent. Avoid kinking or bending the hose excessively, as this can restrict airflow and reduce the efficiency of your dryer.
Step 6: Attach the Hose to the External Vent
Similar to the dryer connection, attach the other end of the hose to your external vent. Secure it with another clamp and tighten it to ensure a firm connection.
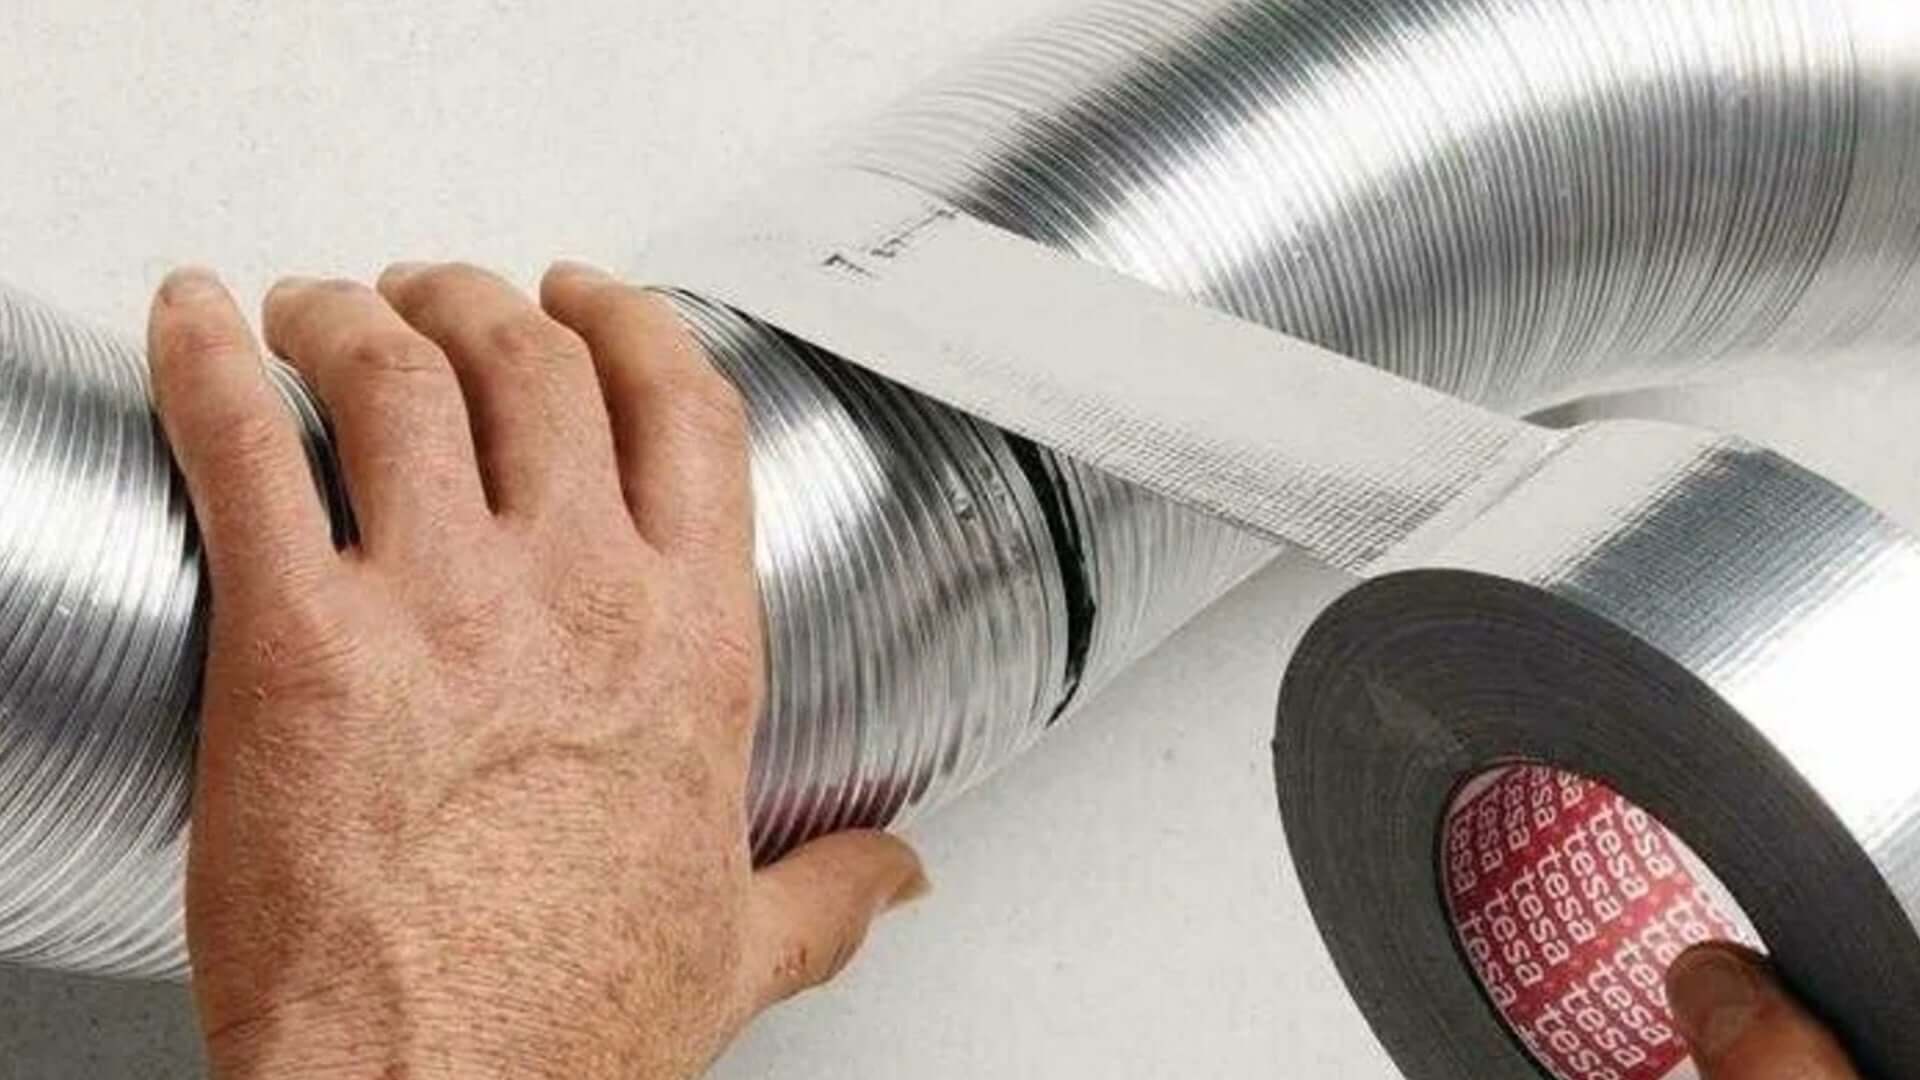
Step 7: Seal the Connections
Use metal tape to seal around both ends of the hose where the clamps are located. This enhances the seal and prevents any leaks of hot air, which could pose a fire hazard.
Step 8: Check for Air Flow
Plug in your dryer (and turn the gas back on, if applicable) and run the dryer on a high heat setting for a few minutes. Check around the hose connections for any air leaks and confirm that air is exiting through the external vent.
Step 9: Secure the Hose Along Its Length
If necessary, support the hose in various sections along its length using additional clamps or straps to keep it from sagging or detaching.
Step 10: Install a Vent Hood (Optional)
If your external vent doesn’t have a cover, install a vent hood to protect the vent from the elements and help prevent critters from entering.
Final Check
Do a final inspection to make sure everything is secure and there are no signs of kinks or pressure points along the hose. This ensures optimal performance and safety. Regular maintenance and cleaning of the dryer vent hose and the external vent will keep your dryer operating efficiently and safely for years to come.